
Index of parts:
- Part 1: Identify your data
- Part 2: Getting started with sensitivity labels
- Part 3: Implementing automatic sensitivity labeling & outlining a labeling strategy
- Part 4: Information governance & automatic sensitivity-based retention labeling
- Part 5: Data Loss Prevention
Data is a critical resource and data-level controls & protections are one of the six pillars in any Zero Trust approach. We want to make sure we’re verifying the identities accessing the data, limiting access to only those who need it and putting measures such as encryption in place to limit harm in case an unauthorized party gets access to the files containing our data.
In the first part of this series, we implemented a custom Sensitive Info Type to help us monitor and discover a specific type of sensitive data in Microsoft 365. This time, we’ll take action to create and publish a Microsoft Information Protection (MIP) sensitivity label which we’ll eventually use to protect content in the cloud.
Sensitivity labels
MIP lets us monitor and protect data across Microsoft 365 services in an increasingly unified way using something called sensitivity labels. Applying these labels to data and containers lets organizations protect, discover and monitor classified data across services.
Keep in mind that by far the most important task in a production-scale Microsoft Information Protection rollout is to define a fitting taxonomy to be used in labeling. It should be tied to company policy and be as coherent and intuitive as possible to employees to enable effective value extraction going forward. When implemented thoughtfully, sensitivity labels reinforce and support employees in keeping company data safe without getting in their way or slowing things down.
In other words, the effectiveness of sensitivity labels in a real-life scenario is tied to the quality of the underlying taxonomy.
Creating a sensitivity label – initial steps 👟
To help us along with our demonstrative case, let’s create a sensitivity label.
This can be done in the Microsoft 365 Compliance portal or with the Security & Compliance PowerShell. We’ll use the portal this time.
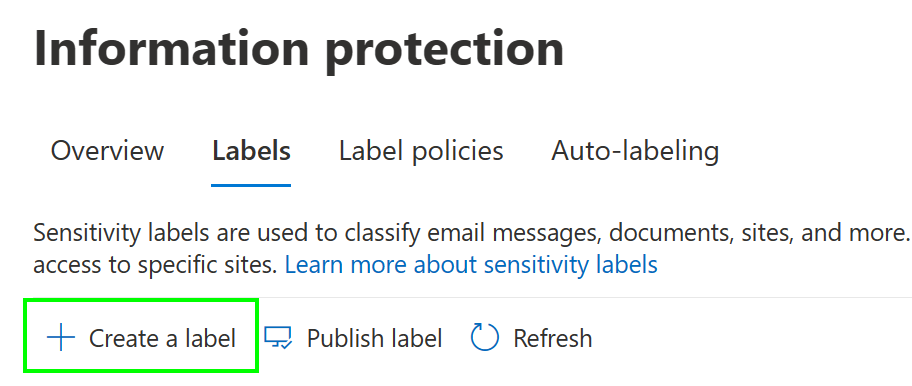
Navigating to Information protection > Labels, we see and option to Create a label, which we’ll select to start the label creation process.
First, we need to provide a name and descriptions for the sensitivity label. This will be the label of highest confidentiality in our environment so we’ll call it Secret. Note that your labels can have a separate name and description for admin portals and for the end-user experience.

I suggest keeping the end-user description simplified while the admin description should go into more technical detail on the controls imposed by the label. I also suggest mentioning the creation date and the admin responsible for the label in the admin description to improve visibility.
Next, we’ll define the scope of the label. This tells the label the context in which it can be used. The options are:
- Files & emails – The primary focus of our use case here.
- Groups & sites – Also known as container labeling. An important capability that we’ll touch on briefly in this article.
- Schematized data assets – A new preview capability that leverages Azure Purview to extend labeling capabilities to assets such as Azure SQL and Azure Synapse. This is a powerful new option that is out of scope for our discussion here. Check out Microsoft’s announcement blog for more details on this.
Let’s select Files & emails along with Groups & sites for our label’s scope.

Next, we’ll need to define the file-level protections the label will apply. Here we have the option to enable encryption and content marking. We’ll enable both, which will prompt us for more details in the next screens.

Creating a sensitivity label – encryption settings 🔐
We just started the process to configure our label to apply encryption to labeled files. Part of this process is defining who can actually access the content once it is encrypted. This is also one the core reasons to encrypting content in the first place.
Here, we’ll choose to configure encryption settings.
Note: We can also configure a label to remove existing encryption – provided, that the user applying the label has the required permissions to do so. This option requires the unified labeling client and is not fully supported by the labeling option built into Microsoft 365 Apps for Enterprise. (source)

When configuring encryption, we will define a couple of things:
- Which users, groups and / or domains can access the file
- What they can do with it once accessed
- How long access to the content is available – in other words, access expiration in days from the moment the data is encrypted using the label
- For how long the labeled data can be accessed on a device without an active internet connection – that is, when the data is held offline.
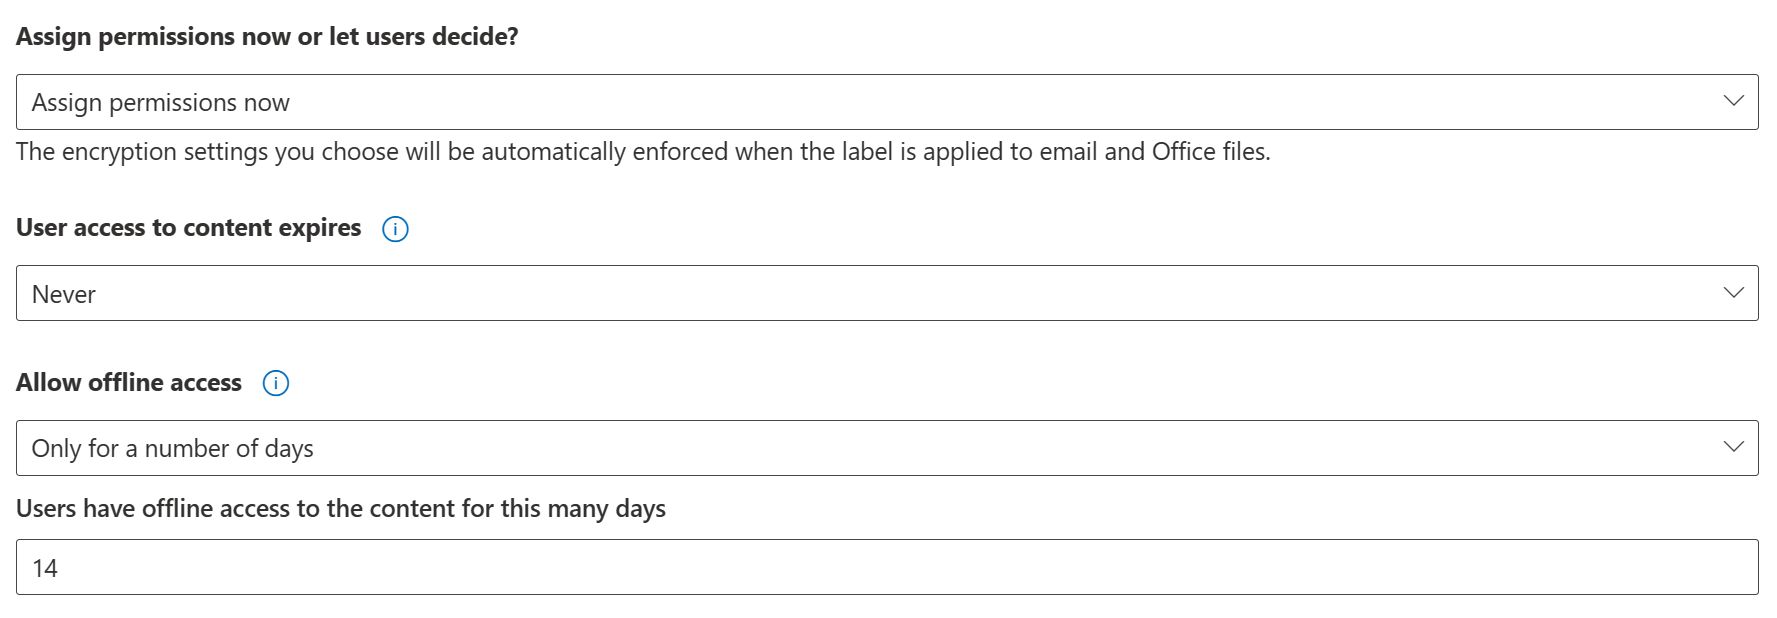
We can either leave these choices up to the user when applying the label or make the choice on the organizational level beforehand. We aim to create a unified org-wide approach for Secret data, so we’ll choose to Assign permissions now.
It is not necessary for us to expire all user access after a set time has passed from label application, so we’ll leave User access to content expires as Never.
We do however want to curtail the length of time files labeled as Secret can be accessed offline. Let’s set Allow offline access to Only for a number of days and select a duration of 14 days – or two weeks, which could be a sensible compromise between usability and security for many cases.
Permissions – or what can and cannot be done with encrypted files ✋
It is very important to consider the necessary permissions to make sure they are defined to protect without blocking regular and necessary work.
As I mentioned earlier, permissions for labeled content can be scoped using one, many or all of the following options:
- All users and groups in the organization
- Any authenticated users*
- Specific users or groups
- Specific email addresses or domains
*An authenticated user means any user who:
- Authenticates against Azure AD or another federated provider, or…
- Has a Microsoft account, or…
- Uses a one-time passcode – only for labeled e-mails though.
Microsoft Information Protection offers the following pre-defined permission sets that you can use to apply more specific permissions to labeled data from most to least permissive:
- Co-owner – can do everything the original owner can, including editing the permissions for the file.
- Co-author – can do everything a co-owner can, except edit the permissions for the file or export the content.
- Reviewer – can do everything a co-author can, except print the document or copy / extract content from the file.
- Viewer – this is the pre-defined “read only” permission. Can view the content and its rights and allow macros. That’s about it.
Aside from the pre-defined permissions, we have a fifth one – Custom. This is not a set permission level and you can define it yourself. We will use it in this scenario.
We only want to allow access to Secret data for our organization’s internal users and guests. We also want to limit the actions they can take with the data to help protect from data loss. To accomplish this, we will use a scope of all users and groups in the organization and set the Custom permission level as follows, with my reasoning added in red:

Setting up our label’s encryption settings in this way means that even if people outside of the organization without guest accounts to our tenant get their hands on a file labeled Secret, they will not be able to read the contents. Internal users do have access to the file but cannot (effortlessly) create digital or physical copies of it. We naturally do have to concede that even encryption doesn’t protect from a malicious insider taking screen captures or photos of sensitive material for exfiltration purposes.
In some real-life cases the permissions might have to be much stricter than even this level of control. For example, only members of a certain dynamic or static group might have anything more than the most barebones “read only” access to such files of the highest confidentiality – if even that.
We also have the option to use Double Key Encryption (DKE) to supplement the encryption key provided by Microsoft with one of our own when encrypting files with this label. DKE is only currently supported when you use the unified labeling client. We won’t use it here, but it’s good to know it exists if a scenario comes up that requires this approach.
Creating a sensitivity label – content marking 📃
Labeled content can be automatically marked in three ways – with a watermark, a header and/or a footer.
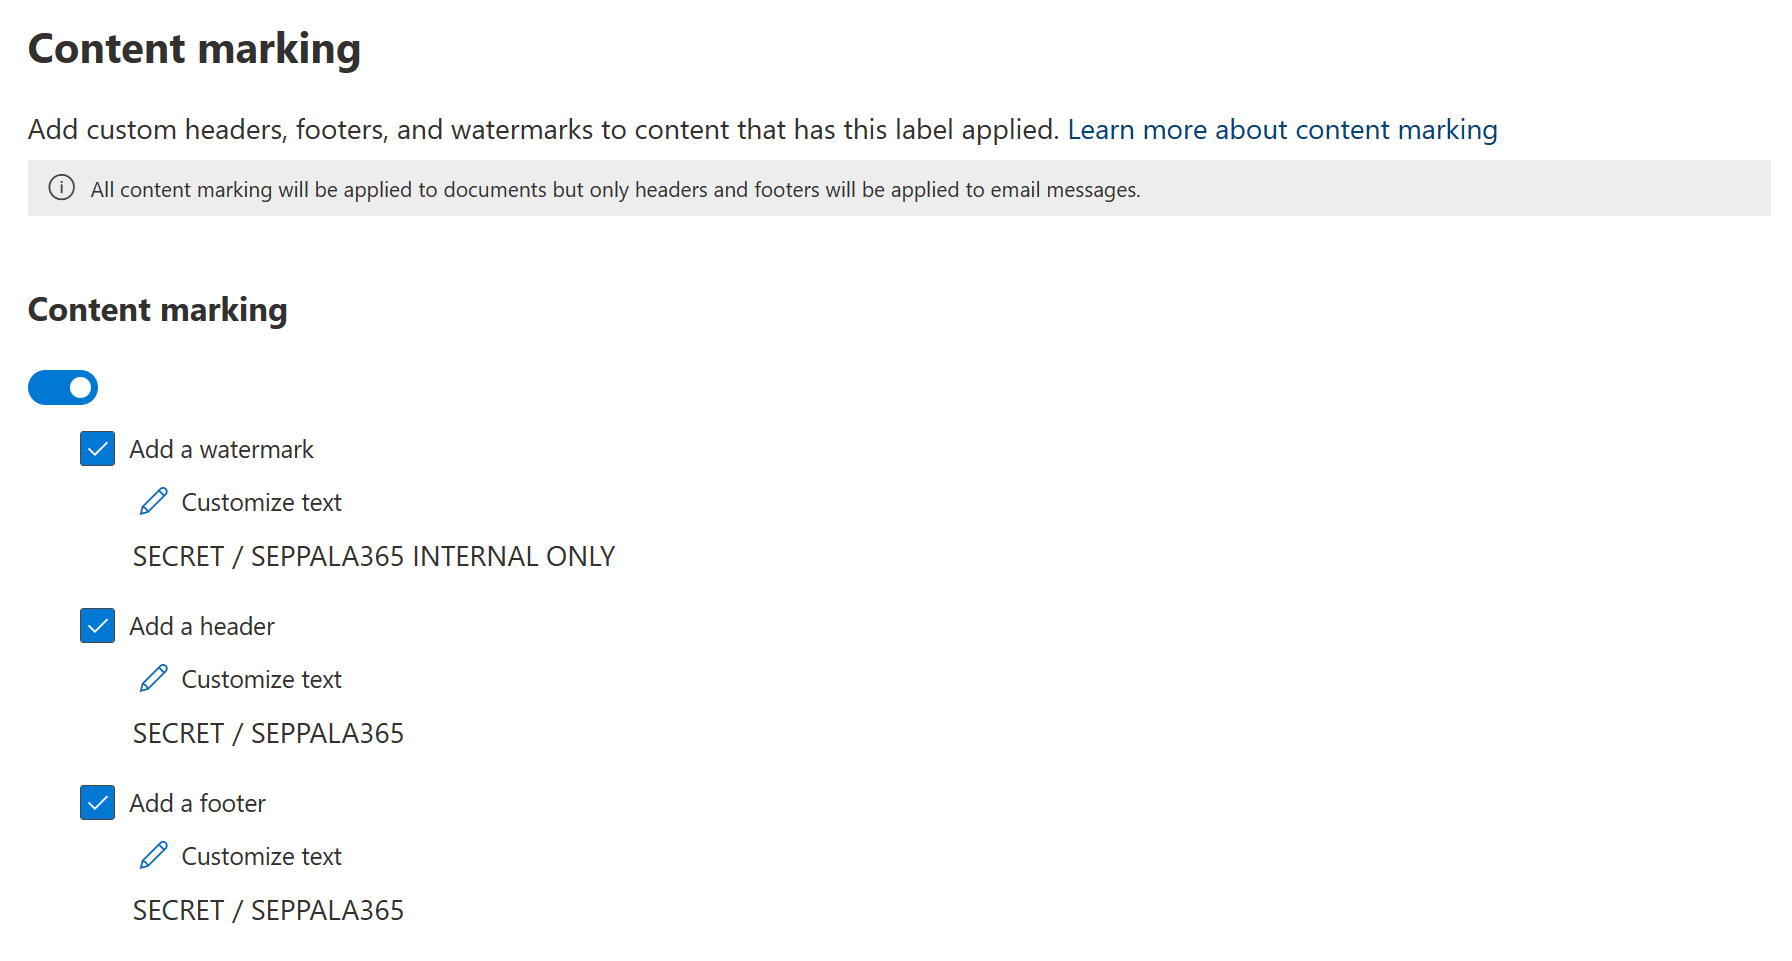
With content marking implemented, files with our label applied will automatically have clear visual cues informing the person accessing the document of its elevated confidentiality, acting as a reminder of the proper processes and restrictions that are associated with handling such data.

Here’s an example of these watermarks applied to a word document – you can clearly see all three marking elements.
You can also see a policy tip with a yellow background near the top of the image informing the person accessing the document of company policy as it relates to externally sharing documents labeled Secret. This is provided by a Data Loss Prevention policy which we’ll get into more in a later installment of this series of articles.

For completeness, here’s also an example of a similarly labeled email. Emails don’t currently support watermarks but do show both the header and the footer.
Markings are not required and are not necessarily always even beneficial. I do feel it is a safe bet to recommend it for higher confidentiality materials, though.
When going through the label creation experience, the next step after content marking would be to define client-side auto-labeling settings. We will skip over these for now and return to them in the next article.
Creating a sensitivity label – controlling groups and sites 📦
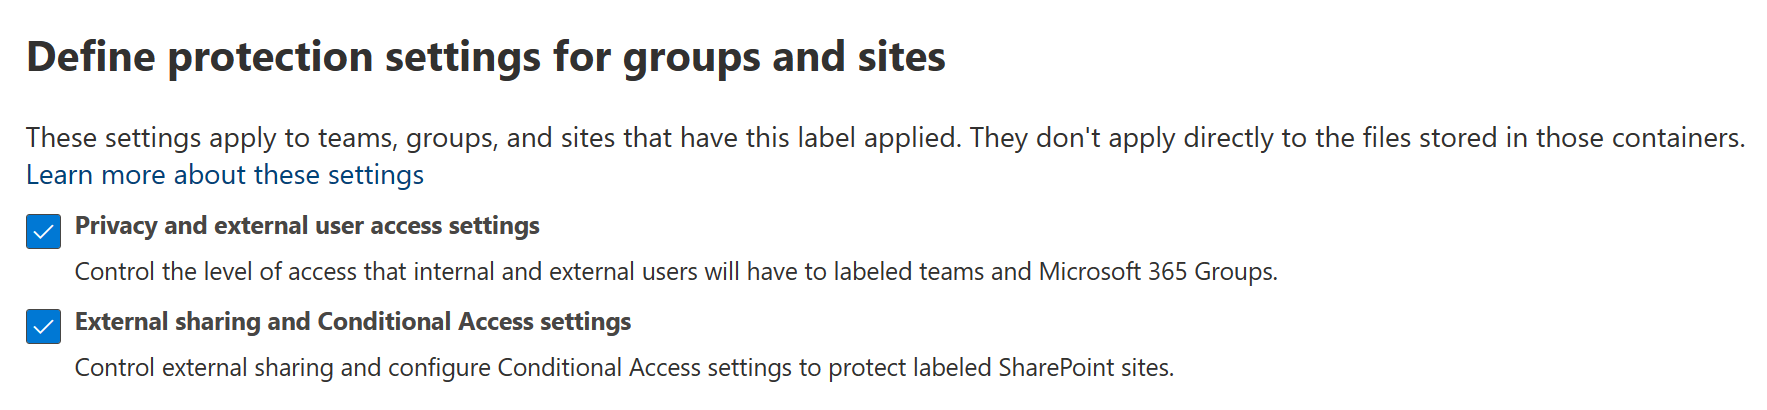
Since we chose to also include Microsoft 365 groups and SharePoint sites when selecting the scope of our label, we are next prompted to select which kinds of protection settings we want to apply to these containers. File protections like encryption and marking don’t apply to labeled containers. Instead, we can use labels to control external sharing, pre-determine available options for group privacy, apply granular Conditional Access policies to labeled sites and more.
First, we’ll choose to apply both Privacy and external user access settings (for M365 groups) along with External sharing and Conditional Access settings (used for SharePoint sites).
When we move on from this high-level prompt, we get down to the details.
First, let’s make sure M365 groups (such as Teams teams and Yammer communities) labeled as Secret have to have a privacy setting of Private. This means members have to be specifically added to the group either manually or via dynamic rule and thus cannot discover the group and join of their own volition. Importantly, we’ll also prevent external users from being added to the group as guests.

Second, we will define the controls for labeled SharePoint sites. We’ll limit sharing of a site’s contents to only internal users. Let’s also choose to use the newest and shiniest preview capabilities to protect access to our labeled site with something called Conditional Access Authentication Context, which essentially means applying chosen Conditional Access policy controls and conditions when users want to access a specific site labeled as Secret.
In this case, we’ll require people to provide a GPS signal from our country of operations through the Microsoft Authenticator app when accessing such a site. The option for this that you see in the image was manually created by me in the Azure portal’s Conditional Access > Authentication context blade.
(Here’s a link to the blade for any curious technical folks reading this – and please read the documentation before creating new contexts as there are a few preview-phase limitations.)

Alternatively, we could for example forego use of CA Authentication Context and choose to only allow limited browser-based access to the site from unmanaged devices instead, which blocks users from downloading, printing or synchronizing files from the site. When Authentication Context hits general availability, I recommend using it especially if you have Defender for Cloud Apps to provide additional protections through Session Policies.
If you want to read a different scenario (with pictures!) using Information Protection, Authentication Context and DfCA session policies, check out my earlier article: Step-up authentication for high-security use cases with Conditional Access authentication context | LinkedIn
At this point we’re ready to create our label. We get one more chance to review all of our key decisions and we’ll get to edit most of them after label creation if necessary.
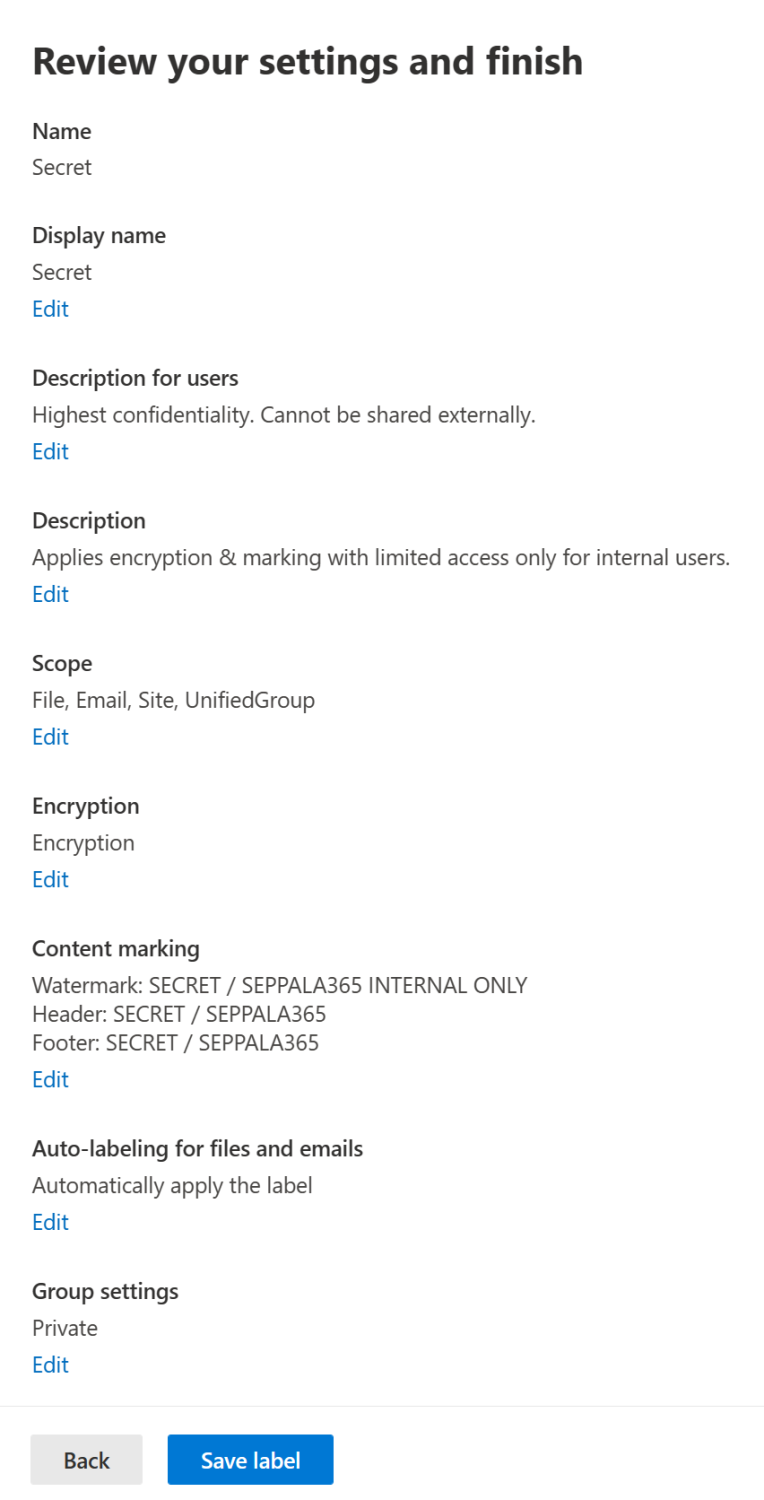
Everything looks OK so we clickety-click the Save label button. With the label now brought into existence we still need to publish it to users and do the one-time task of enabling sensitivity label support for groups. Microsoft Docs covers the latter in detail so there’s no real point going over it again here. Check the link for detailed instructions.
Priority matters 🥇
Each sensitivity label has a priority number. Labels should be ordered so that the least restrictive one gets the lowest number and thus is on the top of the list.

The practical implications of correct prioritization come up in several instances, including but not limited to:
- When users downgrade an applied label to a lower priority, they can be required to provide a justification that is in turn logged. We will discuss how to implement this in a bit.
- If a user uploads a file of a higher priority label (like Secret) to a container such as a Teams team’s SharePoint site with a lower priority label (such as Public), they will receive an automatic sensitivity mismatch notification email informing them of this. These can be blocked with PowerShell if desired.
If you’re still here, I recommend we get up from our hypothetical chair and stretch a bit. 🤸
… Done? Good, welcome back. 👋 Next, we’ll have a quick look at a couple of points related to Power BI and the advanced options unlocked by the Unified Labeling (UL) client. Then it is time to return to the main scenario and check out how to publish labels so people can use them in daily work.
Sidenotes: Power BI and other advanced configurations 🧪
For Power BI specifically, there are several options in the Power BI admin portal under Tenant settings that we can leverage to help extend our labels’ protections to that service effectively. Here’s a quick overview with pictures, because who doesn’t like pictures?

Allow users to apply sensitivity labels for Power BI content – This is the “master switch” that needs to be enabled first so sensitivity labels can actually be used in Power BI. This and the following features can all be targeted to either the entire organization or to specific security groups. Exclusions through security groups can also be used.
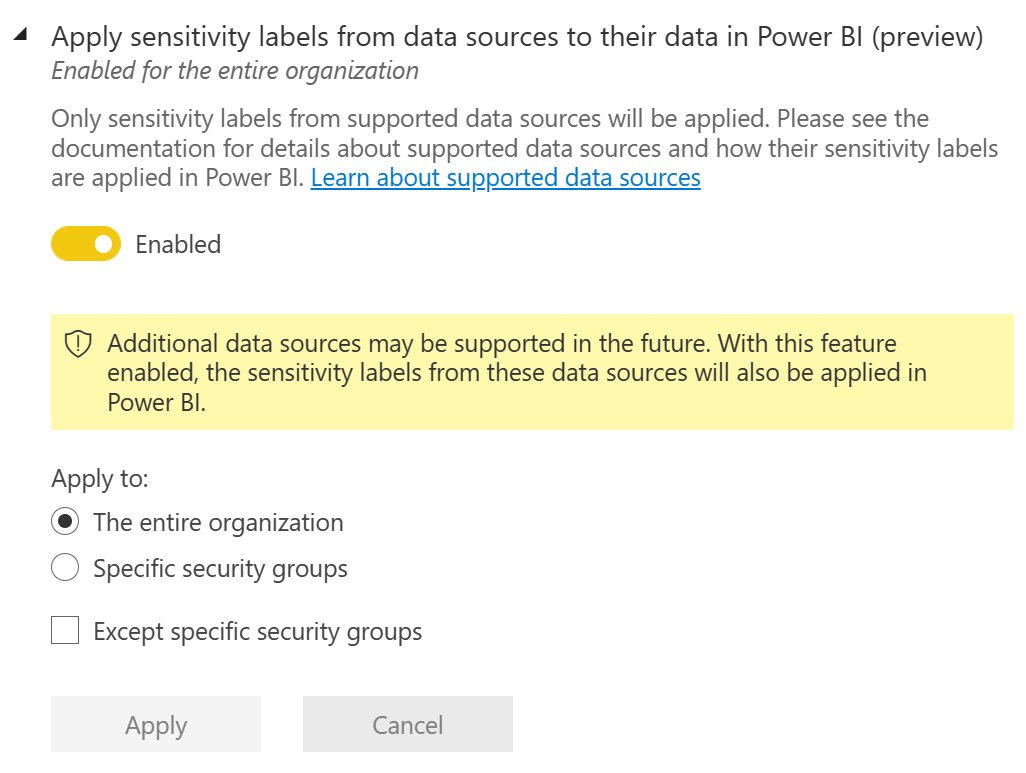
Apply sensitivity labels from data sources to their data in Power BI – Allows Power BI to inherit the label from various data sources – currently supported are Excel files in addition to Azure Synapse Analytics and Azure SQL databases, with the last two being made possible by leveraging Azure Purview. A preview feature.
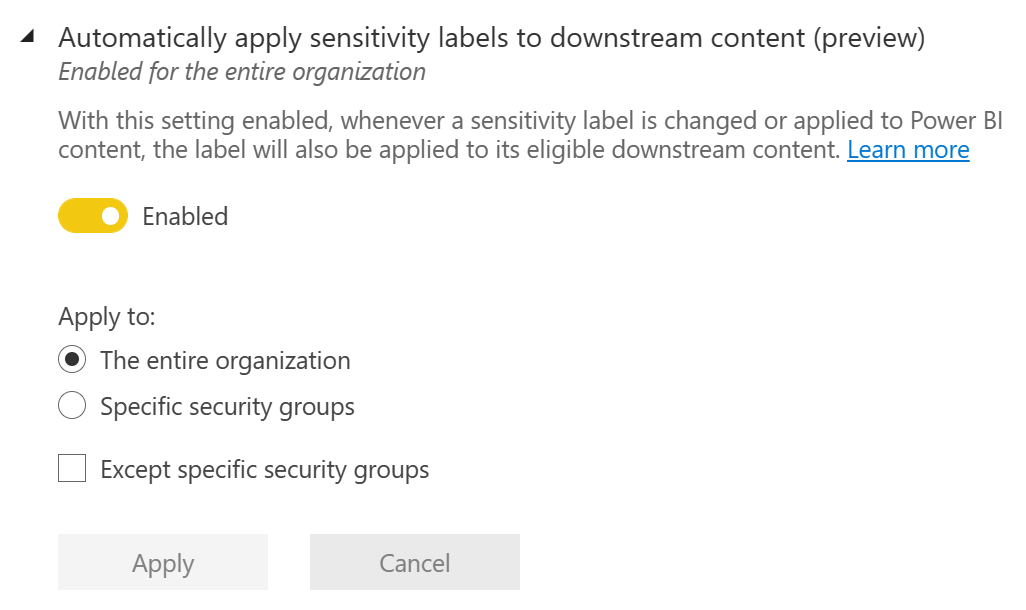
Automatically apply sensitivity labels to downstream content – Downstream content refers to content built from a labeled dataset (other datasets, dashboards or reports) or report (dashboards). A preview feature.

Allow workspace admins to override automatically applied sensitivity labels – Can be used to allow workspace admins to remediate unwanted scenarios that can sometimes crop up in the usage of the previous two automatic label propagation capabilities. A preview feature.

Restrict content with protected labels from being shared via link with everyone in your organization – This setting can help avoid overexposure of confidential data by curtailing org-wide sharing of sensitivity labeled content.
If the Unified labeling client is in use, various advanced settings for labels can be configured with the S&C PowerShell. For example, for global organizations, the possibility to localize label names to various languages might be desirable. Technical readers can find more information on Docs: Custom configurations – Azure Information Protection unified labeling client | Microsoft Docs
💭 Microsoft seems to be gradually bringing various features to the Apps for Enterprise built-in labeling capabilities that have previously been exclusive to the Unified Labeling client so perhaps that is the direction things will develop in going forward.
⚠️ EDIT (Jan 5th 2022): Microsoft announced that the Unified Labeling Client is now in “maintenance mode” – it will not be receiving new features and only major bugs will be patched going forward. This seems to solidify Apps for Enterprise built-in labeling as the go-to option in the long term.
Publishing labels 📢
OK, back on track. To roll sensitivity labels out, there’s one more step to take – publishing them via one or more label policy.
Still in the Compliance portal, let’s navigate to Information Protection > Label policies and select the Publish label option to start creating a new label policy.

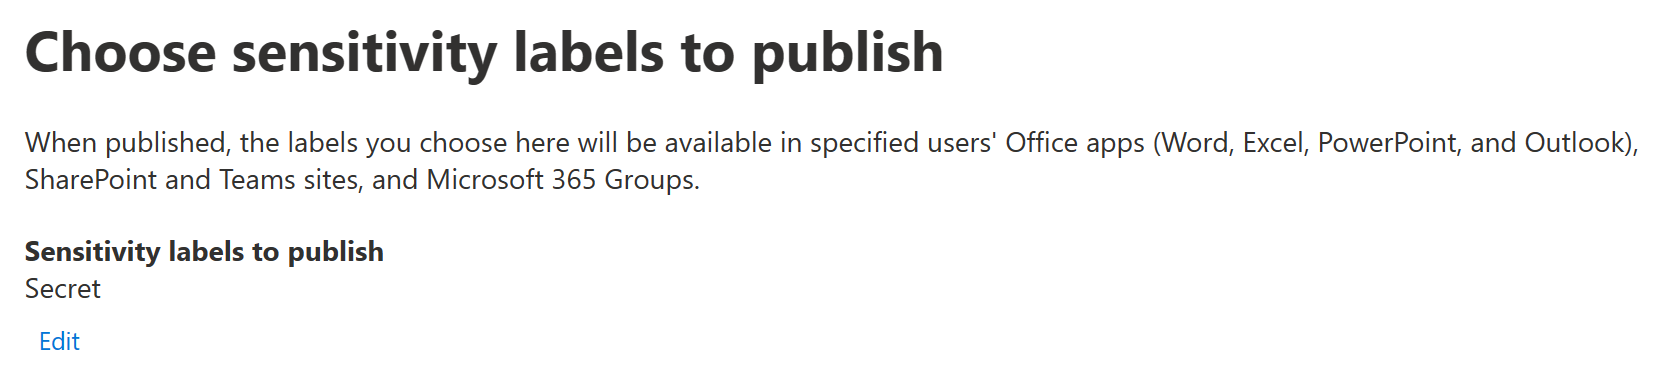
First step: choose the sensitivity labels you want to publish through this policy. Naturally we’ll pick the one we just created, Secret.
Next up, we’ll choose how to target the policy. We can use individual user accounts and various types of assigned and dynamic groups for this. For us, the scope can remain as All users, which is the default.

After this we get to policy settings and things get more interesting. Here’s an overview of available settings:

We can configure the label policy to require targeted users to provide justification when removing or lowering the classification of a file.
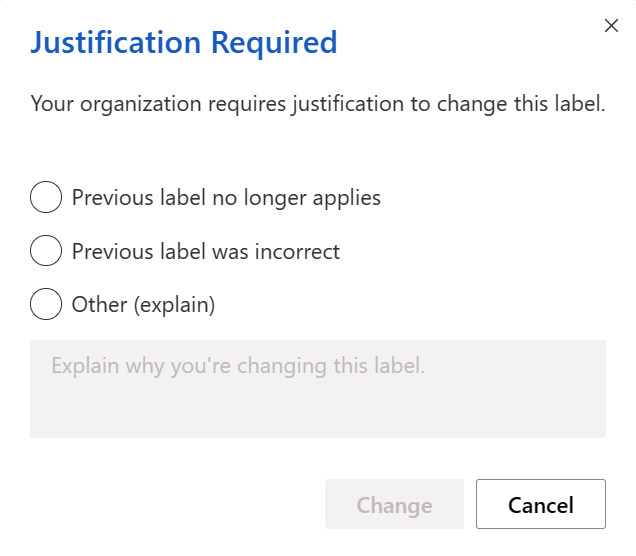
The justification gets logged and is viewable through the Activity Explorer (link for technical readers).
We can implement mandatory labeling for documents, emails and now also content in Power BI, requiring users of the latest Office apps or the Unified labeling client to manually label all files while creating or modifying them if a label isn’t already applied. This can be a good option for initial rollout of Microsoft Information Protection sensitivity labels since people will have to stop and consider the confidentiality of each file they create in order to select a fitting classification. Paired with well-implemented, supplemental automatic labeling for selected use cases – in addition to training and adoption communication – it can provide a fairly sustainable production solution for data classification in the long run.
Do note that mandatory and default labeling do nothing to data at rest that isn’t actively opened or modified so they alone aren’t necessarily enough when shaping a comprehensive labeling strategy for a production environment. We’ll get into that more in a future installment of this series when we discuss service-level automatic labeling.
Finally, we have the option to provide a custom help page link. This can point to, for example, an organization’s internal guidelines for labeling in the Intranet. The link is accessed from the Learn More button in the sensitivity label menu in Office apps, pictured below.

After our label settings are in place, we can move on.
Now (if our licensing permits it) we get to choose if we want to implement a default label for various types of content. We can configure separate default labels for documents, emails, sites & groups and Power BI. A default label is useful but also makes mandatory labeling less of a choice, since a label is already in place – a user might in some cases just accept the pre-applied label and move on without necessarily stopping to make an informed choice. Default labels are currently applied when a document is created and from January, also when a document is opened and no label is yet applied.
This can be both desirable and undesirable, depending on the circumstances. In our case, we’ll make our users choose a label manually for documents, while disabling the option to require users to label their emails.
In practice, this configuration means that mandatory manual labeling only really applies to documents, while emails aren’t similarly restricted but can still be labeled when necessary.
Groups & sites and Power BI content will get the Secret label by default. We will also make users choose some kind of label for all groups & sites on creation, since the increase this causes in manual work is typically negligible in daily life – especially compared to the upsides.

Finally, we’ll name our policy and add a description.

With our label policy created, it might take up to 24h for changes to propagate to all apps and services. Built-in labeling for Microsoft 365 Apps is quicker at an estimated maximum delay of 4h. Word, Excel, and PowerPoint on the web see newly published or modified labels with the shortest delay of an hour or less.
As with sensitivity labels themselves, priority needs to be thought of if there are multiple label policies. When a user is in the scope of several label policies and there is a conflict between settings in them, the policy with the highest priority wins out.
Wrapping up 🌯
A typical production environment sensitivity labeling taxonomy will usually consist of 3-4 or more sensitivity labels – for example Public, Internal, Confidential and Secret. In some cases, sublabels might also be used to denote variations for different use cases – for example the label Confidential might have the sublabels Confidential (Internal) and Confidential (External) to denote whether or not labeled data should be exposed to identities outside of the organization such as to partners.
We have now created, configured and published a single sensitivity label while enabling some key integrations and protections along the way. Next time, we’ll start applying that label to files and email both manually and automatically.
I feel like I also want to further explore the merits of different sensitivity labeling strategies, paving the way for our eventual foray into governance, retention and data lifecycle discussions.
The ride continues as a fresh new year begins – thanks for tagging along and I hope your 2022 starts well.

3 responses to “Information protection & governance with Microsoft 365 #2: Getting started with sensitivity labels”
[…] Part 2: Getting started with sensitivity labels […]
LikeLike
[…] Part 2: Getting started with sensitivity labels […]
LikeLike
[…] Part 2: Getting started with sensitivity labels […]
LikeLike