
Updated on 4/2023 with new chapter: Managing Power Automate email comms with Data Loss Prevention
—
Power Automate is a great tool that people can use to make their workday more streamlined and efficient but there are inherent risks too. One of them is the fact that it can be used to automatically send email to external email addresses, presenting a sizeable data loss surface if used carelessly.
Taking control of email sent through Power Automate can luckily be done fairly straightforwardly without blocking it entirely – after all, there might be (and are!) real use cases for doing so in many situations.
To get this done, we’ll use a mail-enabled security group and two Exchange Online Mail Flow rules. If you aren’t familiar with them at all, check out the linked Docs articles for details.
We’ll take two kinds of actions:
- Block all unsanctioned senders from sending email to external addresses using Power Automate
- Automatically encrypt desired sanctioned email to external addresses with Office Message Encryption (OME)
Block unsanctioned email
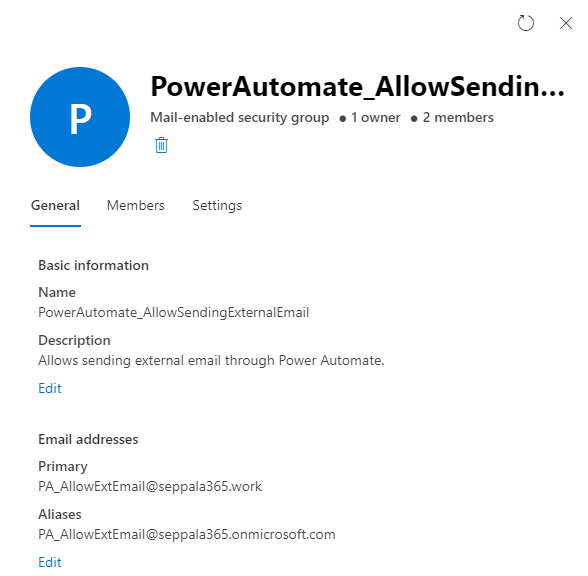
First, we’ll create a mail-enabled security group to enable us to exempt desired accounts from restrictions. Such groups can be created in the Exchange Admin portal. Let’s call the group PowerAutomate_AllowSendingExternalEmail to make its purpose clear.
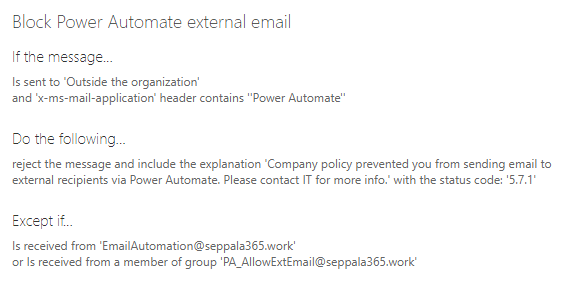
Then we will create the mail flow rule, in which we will make use of the x-ms-mail-application header that lets us identify email specifically sent through Power Automate. We will exempt the mail-enabled security group from the rule and block email from all other senders with an informative message.
With that done, let’s move on.
Automatically encrypt email sent through Power Automate
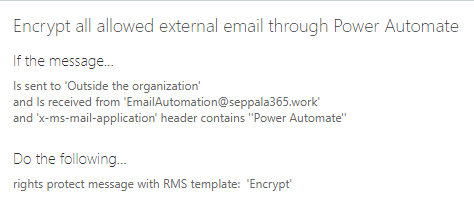
We can reuse part of the previous rule for our other rule, which will apply OME to any email sent from all or specific sanctioned accounts when the email is directed to an external recipient. The rule can look something like this when targeted to a specific account – in this case, a service mailbox used through Send As permissions by a Power Automate workflow:
Let’s see if the solution works.
Field testing
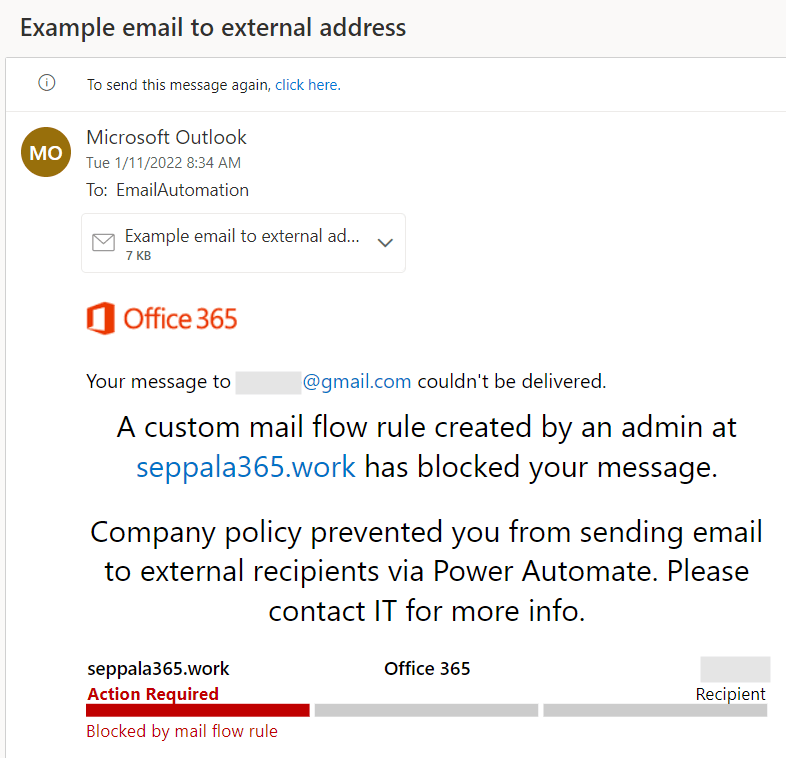
First, I ran the test without marking the EmailAutomation mailbox as a sanctioned account for external email. I configured a Power Automate workflow to send an email to an external @gmail.com account. Within a minute of running the workflow, I got the expected block notice with my custom informative message:
With the first test completed, I modified the rules to allow the EmailAutomation mailbox to send external email through Power Automate and to automatically encrypt all email sent to external recipients from it. I ran my workflow again.
The results were positive; the OME-encrypted email showed up in the external mailbox without delay:
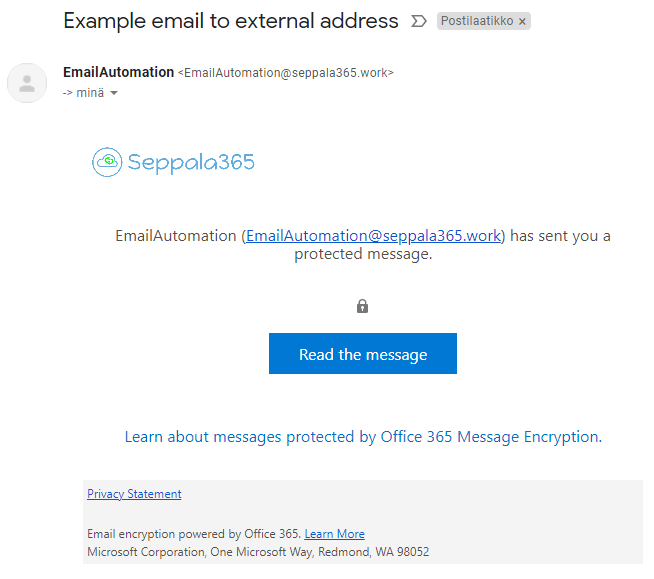
So that’s that – external email sent through Power Automate is now under control. ✔
(Added Jan 19th ’22) Encrypting email for specific workflows
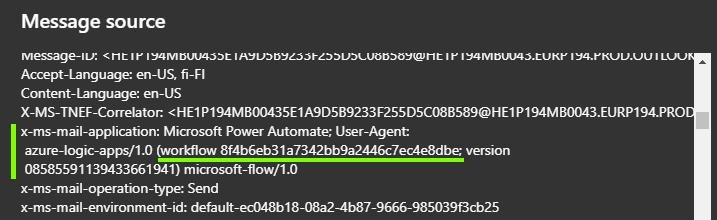
Sometimes you might want to implement automatic encryption for email sent by specific Power Automate workflows. You can achieve this by leveraging the fact that Power Automate adds a unique ID for each workflow into the email headers of emails sent by it. The ID gets added under the x-ms-mail-application header – see image below for an example.
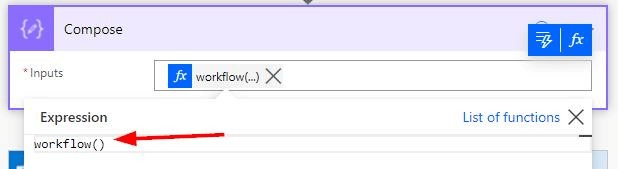
The ID is not immediately visible in Power Automate. You can find it in a few different ways. The first one is to add the expression workflow() into your Power Automate flow – in a Compose action, for example – and run the workflow once.
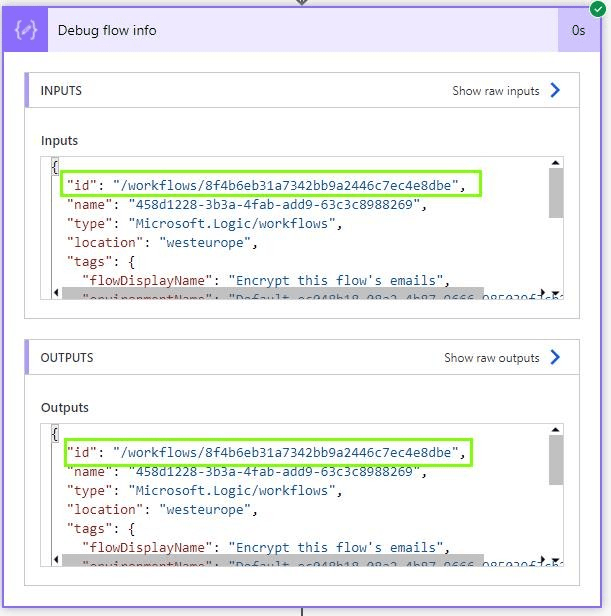
After this, you can find the workflow ID in your run history under the outputs for the compose action. I named the action descriptively in the picture below so I could easily find the correct action in the workflow. The ID is the part after /workflows/.
An another option is to check out the email headers from the receiving end from an email that was already sent by the workflow.
Once you have the ID, you can use it to build a Mail Flow rule such as the one below.
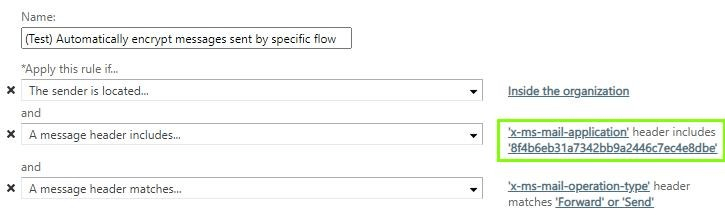
The advantage to handling Power Automate automatic encryption per-workflow like this is that you can actually change the mailbox the workflow uses for sending email without having to reconfigure anything.
Parting thoughts
A couple of assorted notes:
- If you happen to have Advanced OME at your disposal, you could utilize custom branding and expand this case to include things like email expiration and branding specific to email sent through automation accounts.
- Do you foresee the need for people to forward emails encrypted with the “Encrypt only” template in OME with attachments to other people in the organization? If yes, you will want to configure Information Rights Management correctly to make sure the second hand recipients will still be able to open the attachments. You can do this by connecting to the Security & Compliance PowerShell and configuring DecryptAttachmentForEncryptOnly to $true. Read more in Microsoft Docs.
- We could also add a condition to a Mail Flow rule based on the x-ms-mail-operation-type to identify only messages originating from a Send or Forward action.
Thanks for stopping by!
Addendum 4/2023 – Managing Power Automate email comms with Data Loss Prevention
A little update to this one. Instead of Exchange Online transport rules, I would now primarily recommend implementing these controls through Data Loss Prevention rules for several reasons:
- Improved monitoring and reporting
- More granular customization (like integration with Insider Risk Management Adaptive Protection & user risk levels)
- Future-proofing in general
Here’s a quick how-to for the scenarios covered by this blog, but implemented with Data Loss Prevention instead of Transport Rules
Restrict external forward & send by Power Automate flows
To restrict external forwarding with Power Automate in DLP, configure DLP policy scoped exclusively to the Exchange Online location.
Then, create a new rule with the conditions as follows. Notice the configured and optional exclusion group to leave out all email sent with Power Automate from specific mailboxes without excluding individual flows.
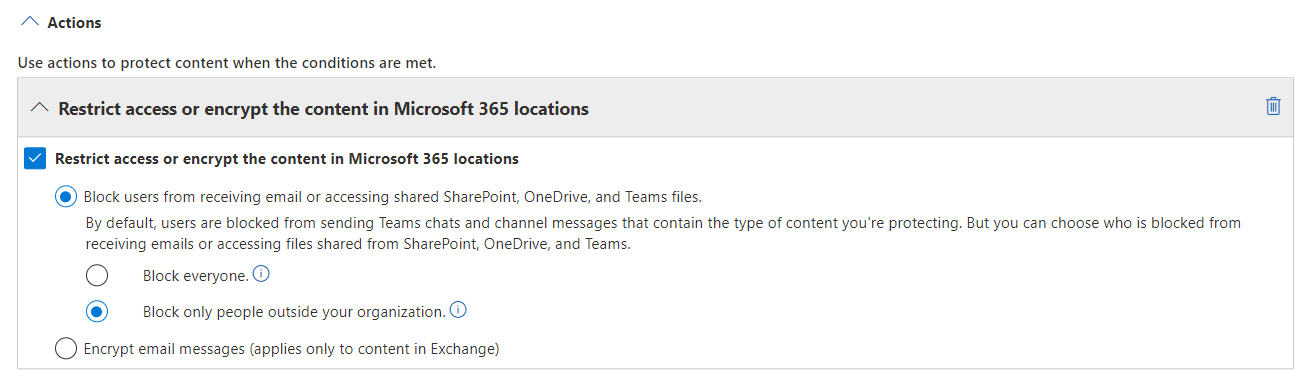
For actions, you want to block external recipients.
By the way, DLP can also send custom block notifications to either the account sending the email, or specific other accounts by selecting Notify these people and specifying the desired recipient.
You can use HTML formatting and dynamic content to customize the notification email so you aren’t limited only to plain text.
It could be a good idea to create a Forms form or other similar request experience you can direct users to from the block notification to request a block exemption by giving you the workflow name and business justification in a standardized way.
You could then look to include the form URL in the email message as a hyperlink, helping them take quick action to remediate their situation if necessary.

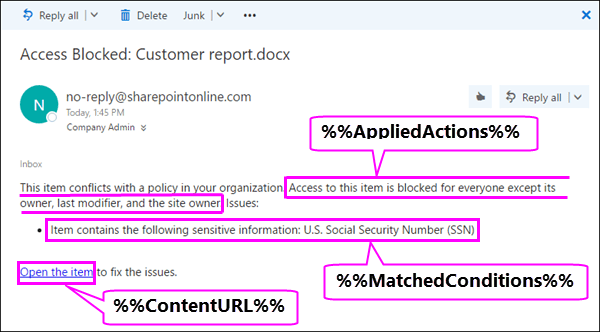
Here’s a quick visual from Microsoft explaining some of the dynamic content you can add to custom emails:
Exempt specific workflows from restrictions
Typically I would look to only exempt specific workflows from external forwarding restrictions based on business justification.
You can accomplish this by adding a new group to the conditions of the rule, by turning on the NOT switch (making it an exclude condition group) and by then adding the Header contains words or phrases condition.
The workflow ID is found in the x-ms-mail-application header of emails sent by Power Automate as discussed earlier in this blog, so you can add each exempted workflow ID as its own row in the rule.
If you end up with most exempted workflows running under a single account (like a service account), I would look to exempt the account itself to reduce management overhead.

Automatically encrypt external email sent by specific workflows
Sometimes you might want to encrypt external email sent by specific workflows or accounts instead of blocking it entirely.
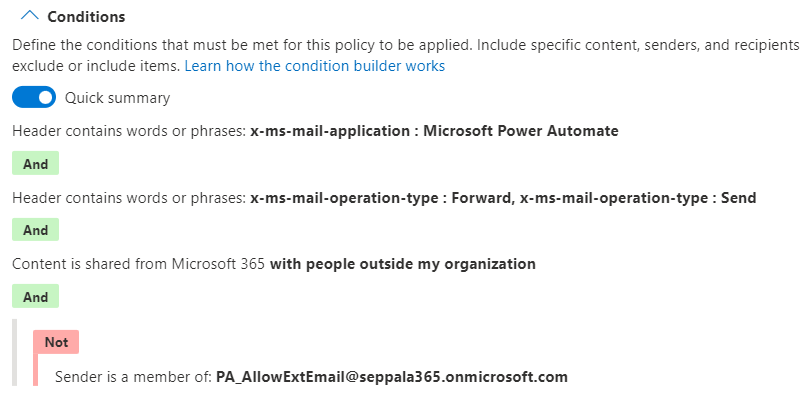
Here’s how you configure conditions in a DLP rule to accomplish this:

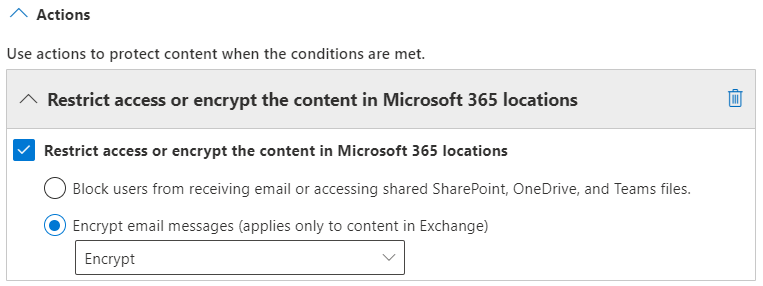
For actions, choose Restrict access or encrypt the content… -> Encrypt email messages and finally, choose the RMS template you want to apply.
Both the built-in OME encryption templates (Encrypt & Do Not Forward) are available along with any Sensitivity Labels with encryption configured that are scoped to emails you have created.
And finally, here’s a summary of what a DLP rule configured to encrypt content sent by specific (approved) workflows could look like.

That’s all for this quick update! I hope this is helpful for you.
