
- Part 1: Identify your data
- Part 2: Getting started with sensitivity labels
- Part 3: Implementing automatic sensitivity labeling & outlining a labeling strategy
- Part 4: Information governance & automatic sensitivity-based retention labeling
- Part 5: Data Loss Prevention
When thinking about implementing information governance in Microsoft 365, what challenge are we exactly aiming to solve? There’s a technical answer to that of course: we are aiming to control how different kinds of content are retained – and occasionally, that might also involve making sure some types of content are deleted or archived at the end of that lifecycle.
Behind the technical details, there are also more fundamental challenges. Understanding these moves us closer to the core of why data governance, retention and records management can sometimes be necessary.
For any organization seeking to conduct business in Microsoft 365 and other cloud services, there is a need to understand the risks involved with holding on to business data for any length of time balanced with the risk of disposing of that data. After all, some data is only operationally critical for shorter periods of time while other data might still serve an important purpose after months or years of retention.
Some of the decisions related to how long certain content has to be retained aren’t even up to the organization and might be dictated by regulation and laws instead. This means organizations need to understand the regulatory framework they are operating in and how that translates to concrete technical requirements.
To help organizations translate their data governance requirements to functional controls, Microsoft 365 offers capabilities such as retention policies, retention labels and for certain scenarios, records management. There’s also the Compliance manager, which aims to provide assessments and guidance for targeted improvement of an organization’s compliance posture.
The topic of data governance is a grand one and to cover every aspect would take an entire series of blogs. Luckily, Microsoft engineers already provide excellent guidance and best practices in the Compliance CXE GitHub repository, which I warmly recommend.
Scenario continuation
In our ongoing scenario, we have created custom sensitive information types, which we then leveraged to automatically apply Microsoft Information Protection sensitivity labels certain types of key business data, applying encryption and other controls. This time we will build on that foundation and do two things:
- Establish baseline retention policies that will ensure the retention of all created business data for a period of one (1) year.
- Create a solution automatically apply a retention label for files with a sensitivity label of Secret. The label will retain the files for five (5) years.
Creating baseline retention policies
I call the policies we will be creating here baseline retention policies specifically because they define the minimum amount of time we need to be able to ensure the targeted content is retained and not possible to be deleted permanently – by end users or by admins or any other means. Other, more specific scenarios might need their own controls.
First, a few words about the principles of retention. When applying governance controls, retention always wins over deletion. In practice, let’s imagine we have a file called BusinessData.xlsx that is stored in SharePoint Online. Two different governance mechanisms with conflicting needs are applied to the file:
- A service-level retention policy targeted to SharePoint Online that is configured to retain all content for one year after it is created.
- A retention label applied directly to the file that is configured to delete the file 6 months after it is created.
The outcome is decided based on retention time, not on the level of individual controls. In the example case, this means that the policy doesn’t win over the label, but rather the longer retention time wins over the shorter one. Multiple retention policies and a single retention label can be applied to a piece of content at any time. Even then, the rule remains the same.
In the principles of retention, Microsoft puts things in clear terms:
(…) you can be assured that retention always takes precedence over permanent deletion, and the longest retention period wins. These two simple rules always decide how long an item will be retained.
OK, back to our scenario. To create our retention policies, we will head on over to the Compliance portal’s Information Governance page. There, we’ll navigate to the Retention policies tab and select New retention policy. All in all, we will be creating four (4) different policies – the minimum amount required to cover all available locations. More on that in a bit.

We’ll name the first policy Baseline / 1y retention only / EXO, SPO, OD, M365 Groups. The name denotes the locations we will be targeting with this policy. It is also a good idea to give a clear, concise description of the intended retention controls and possibly make a note of the creation date (and any subsequent modifications) along with the account responsible for the changes.
Moving on, we’ll need to choose the scoping mechanism (or type) for the policy. There are now two options available – the traditional Static which is applied to all objects, specific objects or a mix of the two, with the possibility of similar exclusions. The fresh new dynamic option called Adaptive lets us use something called Adaptive policy scopes (created separately) to dynamically target certain objects based on attributes. This is essentially the same kind of rule-based targeting mechanism as seen in Dynamic Azure AD groups. As an attribute-based mechanism, adaptive scopes are excellent for unlocking a multitude of clever scenarios for organizations with accurate and enriched Azure AD master data.
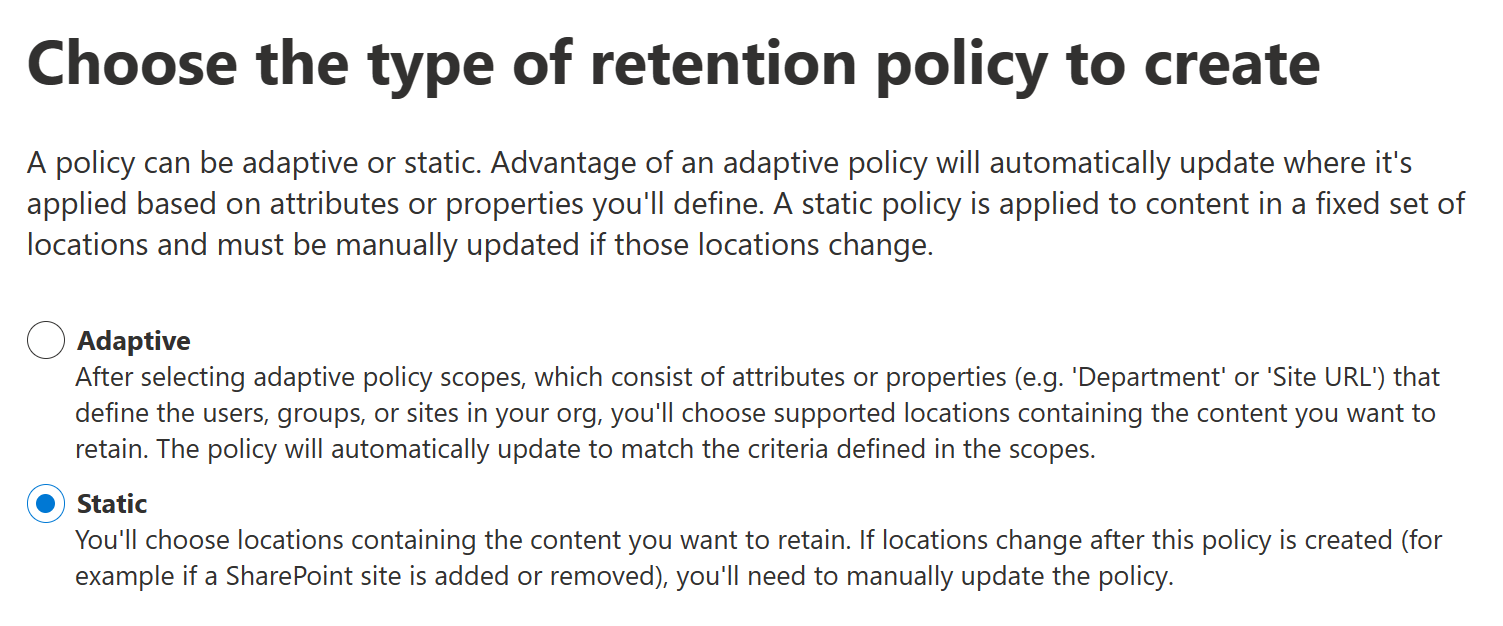
For our baseline, we will go with Static. Next, it’s time to choose the locations for the policy. As a service-level control, retention policies aren’t applied to individual pieces of content but rather to all supported files within a service and the chosen user scope. Not all available locations can coexist in the same policy and it might actually be valuable to create separate policies for each location to enable easy and granular fine-tuning in the future – even for baseline policies. We’ll simplify things a bit and create our first policy for:
- Exchange email and public folders
- OneDrive accounts
- SharePoint sites
- Microsoft 365 Groups

For the last two, you should know that the retained copies of deleted files protected by the policy take up their own piece of the SharePoint site’s storage quota just like non-deleted, normal files. This might necessitate configuring higher or flexible site storage quotas for sites and groups for which very long (or indefinite!) retention times are applied.
After choosing the locations, we still need to choose the controls applied by the policy. Retention time can be anything from 1 day to until the heat death of the universe, but we’llgo with one year as I mentioned earlier.
The retention time applied by retention policies can be calculated from when an item was created but also from when it was last modified. We’ll choose the former.
At the end of the chosen retention period, the item can currently either be deleted permanently or left as it is, doing nothing. We’ll choose the latter.
Note that if necessary, retention policies can also be configured to forego the retention part entirely and just delete content after a set time calculated from creation or modification. This might be useful when local regulation only stipulates the maximum but not a minimum length of lifecycle for data stored in a service.

After controls are configured, we’ll review our chosen settings and then choose Submit to create the policy. Once created, it might take up to seven days for the policy to apply to all targeted content. A plus side of using retention policies is that no user interaction is required to apply governance controls to data.
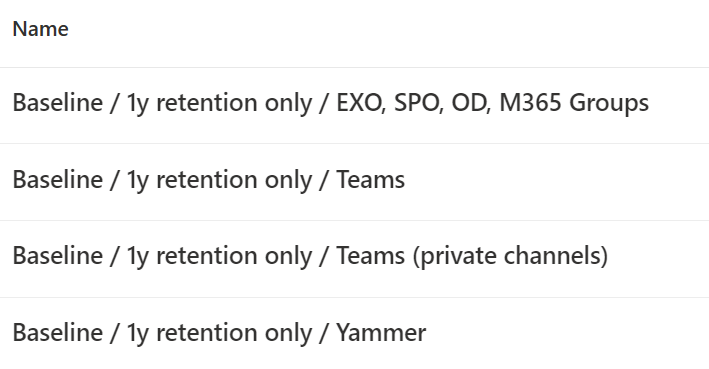
The rest of the retention policies, then. There will have to be three more, to account for Teams content, Teams private channels and Yammer content not being able to coexist in the same retention policy. The descriptions will be similar, as will the controls and the names. The illustration below gives you an idea of the outcome.

A solid working knowledge of where different kinds of data are stored in various Microsoft 365 services comes in handy when designing retention policies. For example, with Yammer in Native Mode, files uploaded to communities will actually end up in SharePoint Online and thus will be affected by a different retention policy than Yammer messages – same story with Teams.
The end result will look something like this:
With the baseline established, let’s move on to govern our highly sensitive use case – documents labeled as Secret.
Creating a retention label
While retention policies offer sweeping capabilities good for covering the most typical and widespread needs, retention labels offer something different – the ability to apply enhanced and granular governance controls to individual files that go above and beyond those offered by service-level policies.
Like sensitivity labels, retention labels can be applied automatically and files can only have one of them at a time. Let’s create a label for our use case.
From Information Governance > Labels, we will select Create a label.

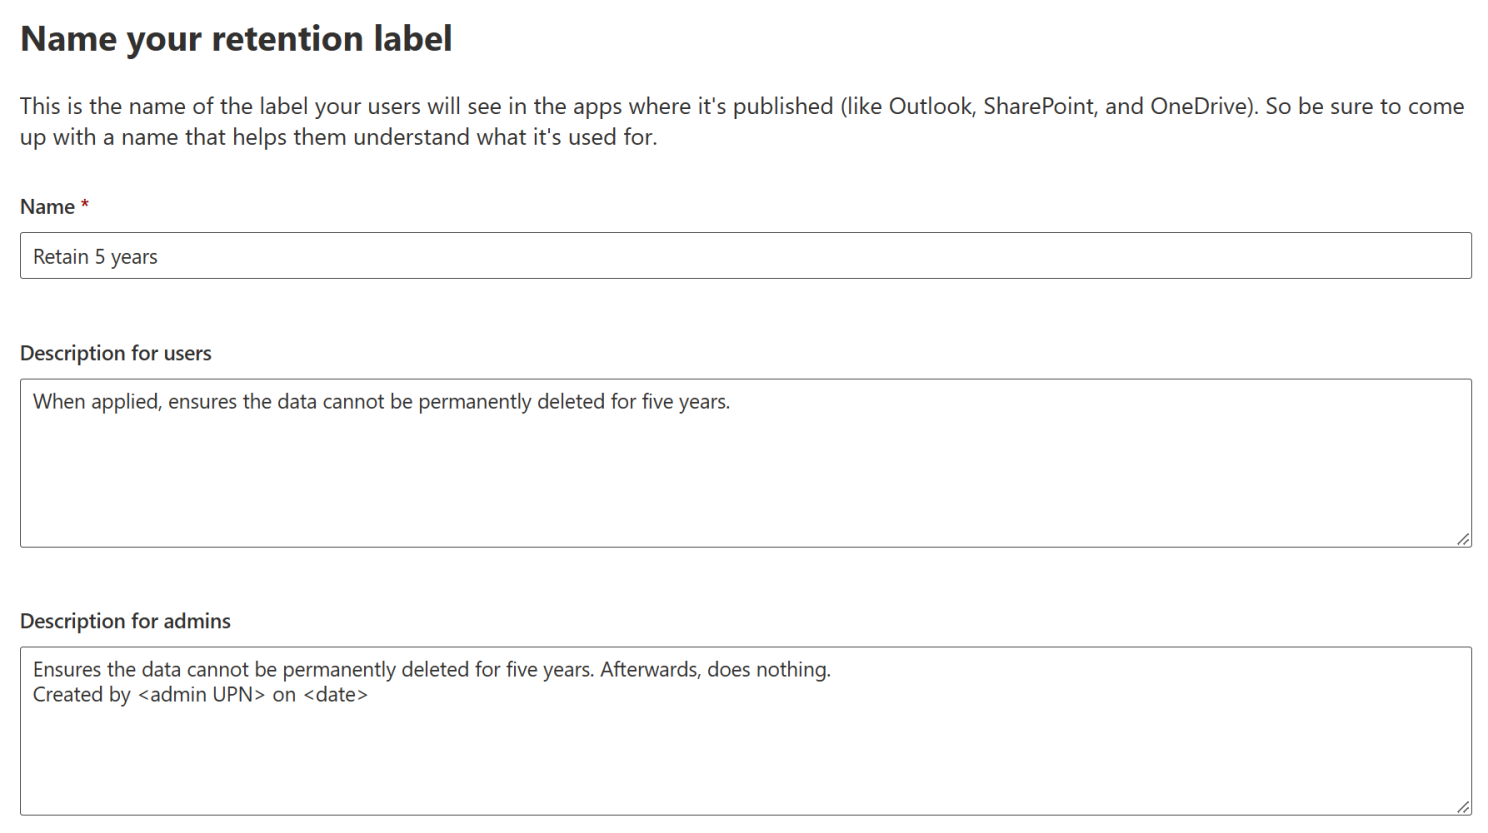
Let’s name our label Retain 5 years and once again give it clear descriptions for both end users and a separate one visible on for admins that goes into more detail.
Next, we get to a familiar-looking screen in which we will choose the controls enforced by the label. The same options are here from when we configured retention policies, along with some new ones. A few words about the new options:
Once the specified retention period is over, retention labels can be set to trigger a disposition review for the labeled file. Choosing this option will let you designate between one to five separate stages of reviews to determine whether the piece of content can be deleted at the assumed end of its lifecycle. Apart from individual users, you can also leverage mail-enabled security groups to target who takes part in each stage of this review process. An individual person can only take part in one single stage of a review process.
You can also configure a retention label to not take any action at all, in which case it will be a simple classification mechanism that enables monitoring labeled data across services.
Retention labels are very versatile when determining when to start the actual retention period. Besides the two options (creation and last modification) available to retention policies, labels can also calculate the period from when the item was labeled. Additionally, there are several event types that can trigger the retention period of an applied label. These usually come into play when implementing records management and include:
- Employee termination
- Employee activity
- Expiration or termination of contracts or agreements
- Product lifetime
These events let you, for example, apply a retention period of three years for HR documents starting from when an employee that the documents apply to has their contract terminated. I won’t get too far into the nitty-gritty of event-based retention in this blog but it is an interesting capability for sure.
We will configure our label to retain data five (5) years from when it was created and do nothing at the end of the retention period. This is the proper control for our scenario since we assume that our automatic sensitivity labeling implementation will ensure correct classification is ingrained into the content creation process.

After this, we’ll move to the next page and hit Submit. After label creation is done, we have the option to immediately publish the label to end users for manual use or to create an auto-apply policy. We’ll go with the latter.
Automatically applying a retention label to sensitive content
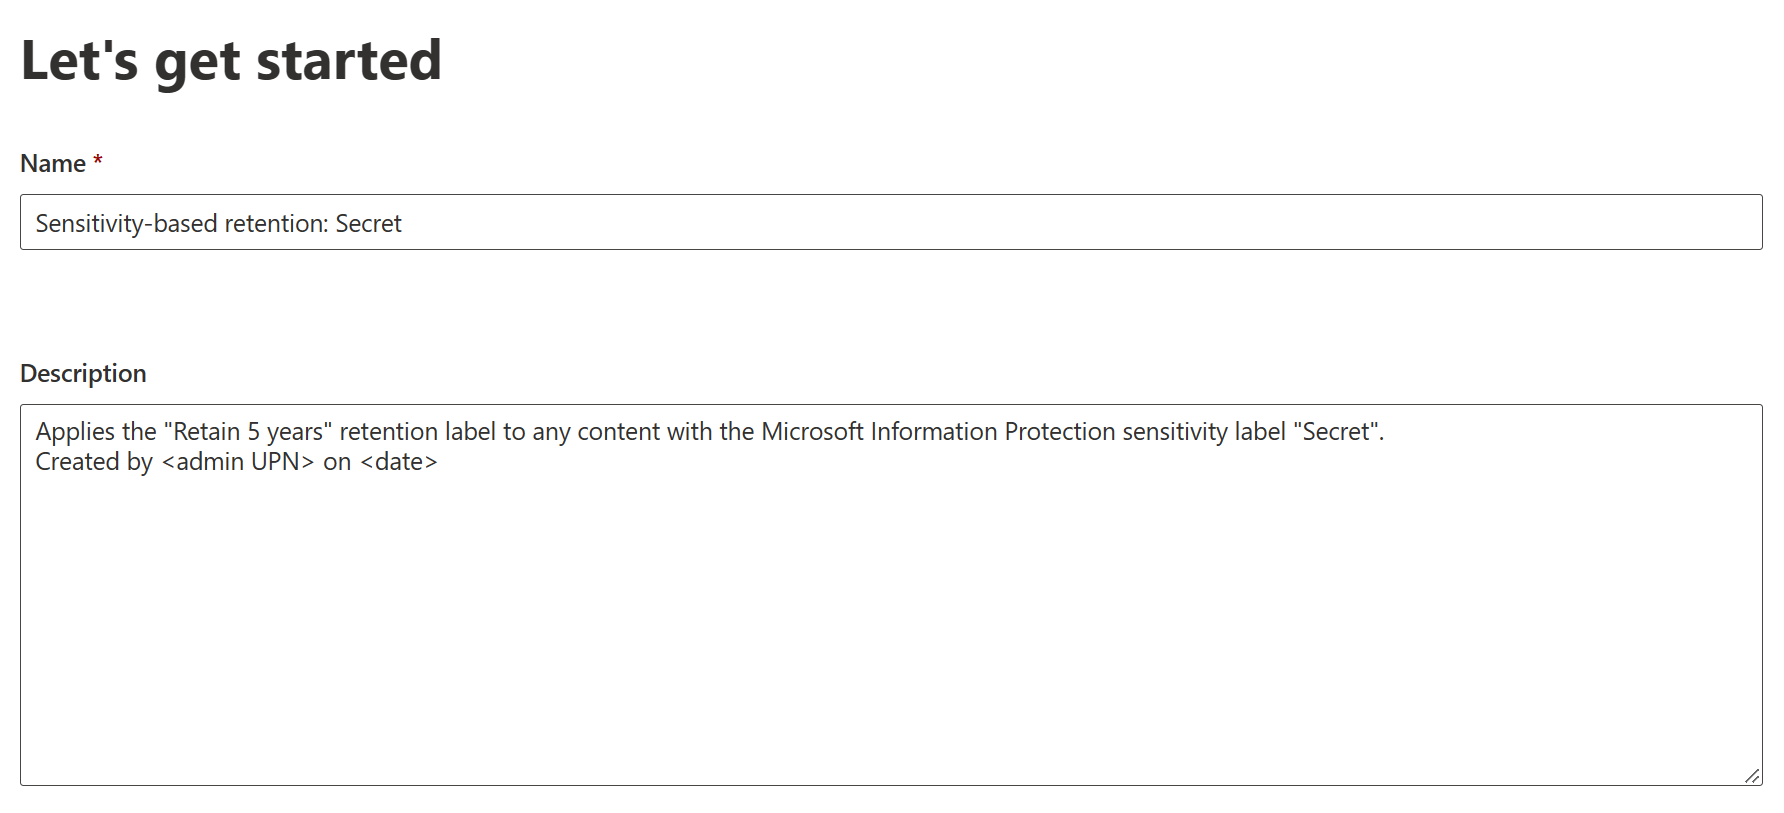
It’s time to create a policy to automatically apply our newly-created retention label to any files that already have the sensitivity label of Secret applied to them, ensuring that the most sensitive content isn’t accidentally or intentionally destroyed for five years since the content’s creation date.
First, it’s time to name and describe the auto-label policy. Like the service-side auto-labeling policies for Information Protection, auto-labeling policies for retention labels work service-side without requiring any input from users.
We have several methods of automatically applying retention labels to content:
- We could use a built-in sensitive info type provided by Microsoft or a custom SIT, like the one we created to start this whole scenario in the first place.
- We could depend on a trainable classifier – or in other words, a trained machine learning model to identify targeted content.
- The third option – and the one we will go for – is to look at certain words, phrases or properties in content to determine whether to apply a retention label.

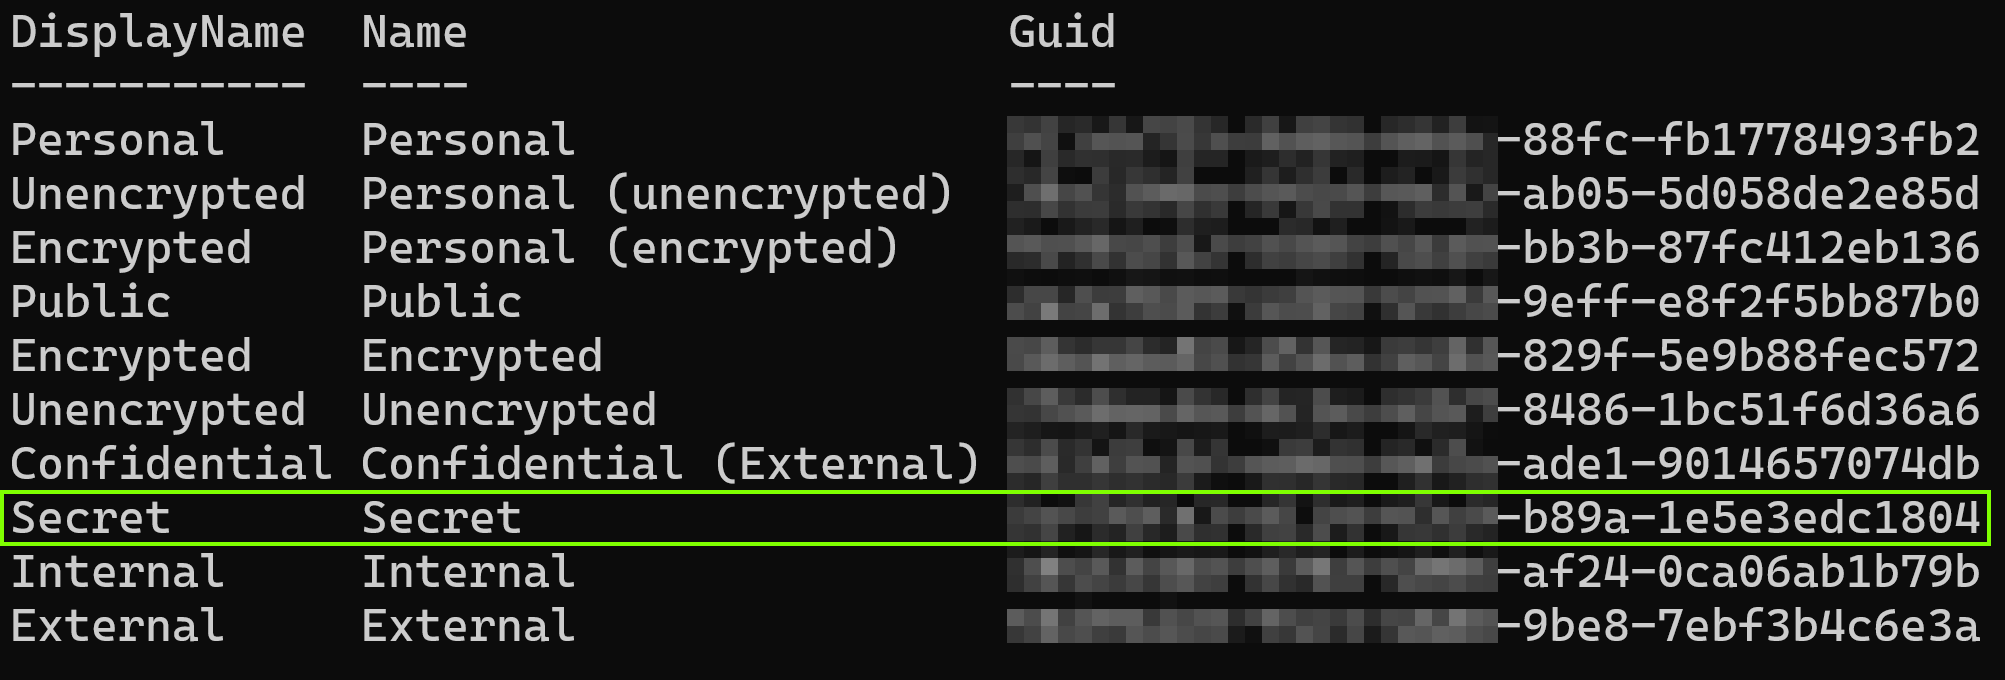
Here’s the trick – sensitivity labels are essentially stamped on files as metadata or rather, as a property called InformationProtectionLabelId. Each sensitivity label (including sublabels of parent labels) have their own, unique ID. To find out that ID, you have to first connect to the Security & Compliance PowerShell and then run the command:
Get-Label | Select DisplayName, Name, Guid
This will net us a clean list of available sensitivity labels. We’ll make a note of the Guid for the Secret label and hop back to our browser.
For our auto-labeling rule, we’ll choose:
InformationProtectionLabelId:Guid
with Guid replaced by the unique id of the desired sensitivity label.

After setting the query, we once again have the option to use dynamic targeting with adaptive scopes. This would let us, for example, automatically apply a certain retention label to Secret files created only by people from the Research & Development department. We will go with Static scope for now.
Auto-labeling for retention labels currently works for Exchange email, SharePoint sites, OneDrive and Microsoft 365 Groups. We will target all of them.

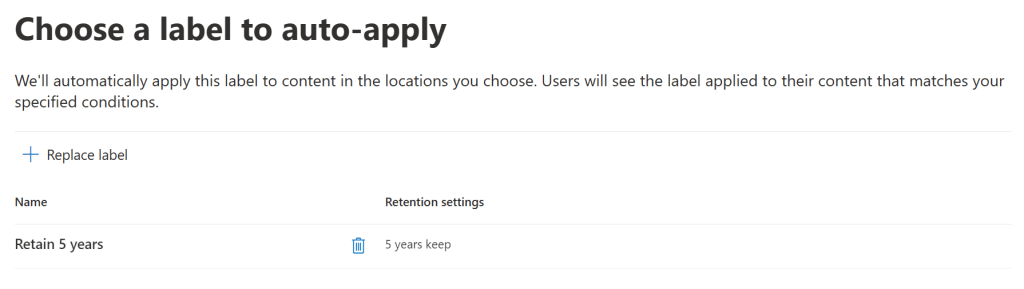
Finally, we’ll get to choose the label to apply. Remember – there can only be one per file. Also, retention labels applied by an auto-apply policy will not be changed even if the policy itself is altered after they take effect. Existing manually applied retention labels will not be replaced by the auto-apply policy, either.
Once the label has been selected, we can move on and create the policy. Like with service-side retention policies, it can take up to seven days for a label to be applied automatically.

We can check the Data classification – Overview page to get high-level metrics on retention label usage in our tenant.
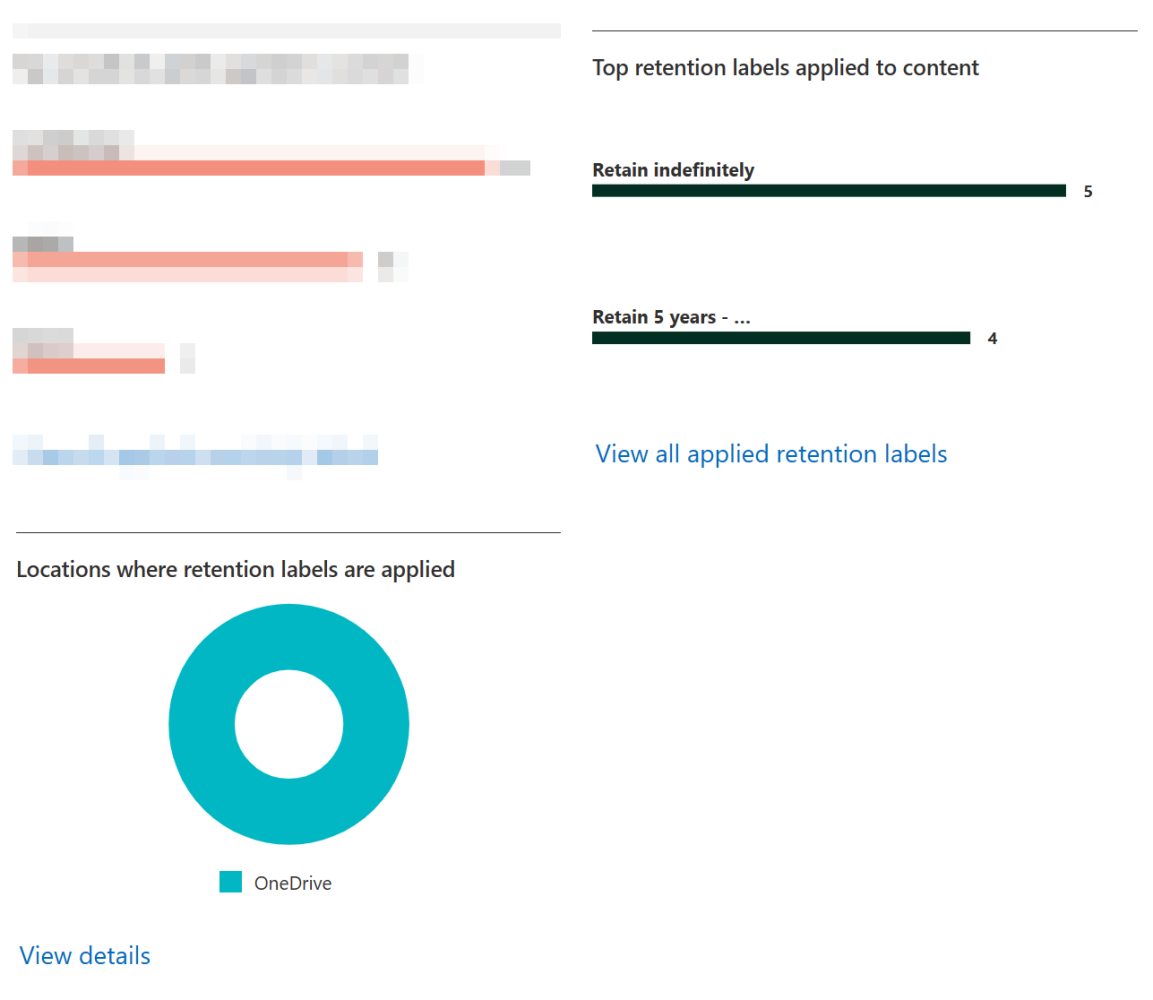
For end users, applied retention labels are visible in several places, such as in OneDrive’s file details pane where users can also manually choose from labels published to them. (The labels in the image below are from a different scenario to this one and are thus subtly different from what we configured here.)

This concludes our little foray into retention policies and labels.
Next time, we’ll look to leverage sensitivity labels again when implementing the final piece of the Information Protection & Governance puzzle – Microsoft 365 Data Loss Prevention policies.
Thanks for coming along – stay healthy & have a good one!

5 responses to “Information protection & governance with Microsoft 365 #4: Information governance & automatic sensitivity-based retention labeling”
[…] Part 4: Information governance & automatic sensitivity-based retention labeling […]
LikeLike
[…] Like Loading… February 6, 2023 Security & Compliance Purview / Information Protection, Purview / Sensitive data discovery ← Information protection & governance with Microsoft 365 #2: Getting started with sensitivity labels → Information protection & governance with Microsoft 365 #4: Information governance & automati… […]
LikeLike
[…] February 6, 2023 Security & Compliance Purview / DLP, Purview / Information Protection ← Information protection & governance with Microsoft 365 #4: Information governance & automati… → Taking charge of email sent through […]
LikeLike
[…] I covered data lifecycle management in more detail in my earlier blog: Information protection & governance with Microsoft 365 #4: Information governance & automati… […]
LikeLike
[…] Part 4: Information governance & automatic sensitivity-based retention labeling […]
LikeLike